RJ45 Strain Relief Boot: What It Does and How to Fit One
An RJ45 strain relief boot is a small flexible sleeve that slides over the back of a plug and the first few centimetres of cable. It stops the cable from bending sharply at the point where the wires meet the contacts. That is where most Ethernet cables fail. A black 10-piece pack, like the one this page covers, is enough for a small rack, a hotspot setup or a home office.
Boots are cheap, usually well under a dollar each, yet they save a lot of troubleshooting. A cable with a cracked latch or a bent wire pair can cause dropped packets that are hard to trace.
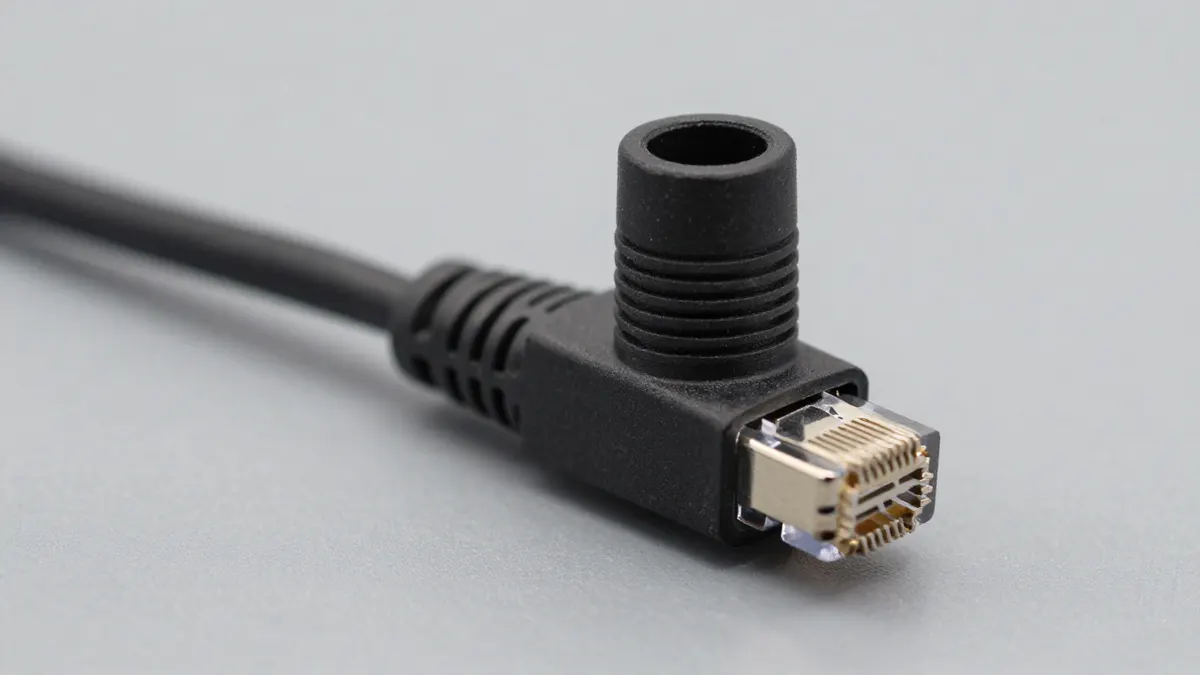
What an RJ45 strain relief boot actually protects
Three weak spots get covered. The first is the cable jacket where it enters the plug, which tends to kink when the cable is pulled sideways. The second is the plastic latch tab, which snags on other cables and snaps off. The third is the crimp itself, where the wires are pressed onto the gold contacts.
Outdoor and rooftop installs, such as a LoRaWAN hotspot with an antenna mast, put extra load on cable ends. Wind moves the cable, and a loose plug slowly works itself out of its port. A snug boot spreads that force along the cable instead of concentrating it at one spot.
Choosing the right size and type
Boots are made for a specific cable diameter. Check the outer jacket before you buy anything.
- Cat5e cable is usually 5.0 to 5.5 mm across.
- Cat6 is often 5.8 to 6.5 mm.
- Cat6a and shielded cable can reach 7 mm or more.
Most standard boots fit cable up to about 6 mm. If your cable is thicker, the boot will either refuse to slide on or stretch and split. A boot that is too loose is just as bad, because it slips back and protects nothing.
Latch-protecting boots and snagless boots
Some boots cover the whole plug body and leave only a thin opening for the latch. These are called snagless. Others stop at the back of the plug and leave the latch fully exposed. For patch panels and tight racks, the snagless style is easier to pull out without catching neighbours. Full-cover styles can make it harder to press the latch, so give yourself a bit of grip room.
Colour
Black blends in. Many people pick other colours to tell VLANs, uplinks or PoE lines apart. With a 10-piece black pack, a permanent marker or a small label on the cable does the same job.
How to fit a boot before crimping
The order matters. Once the plug is crimped, you cannot slide a boot over it from the back, because the plug is wider than the opening.
- Cut the cable end square with a cutter.
- Slide the boot onto the cable, narrow end pointing away from you, wide end facing the cable end.
- Strip about 25 mm of the jacket and arrange the pairs in your chosen order, T568B being the most common.
- Trim the wires flat, leaving roughly 12 mm exposed, then push them into the plug until each reaches the front.
- Crimp the plug, then slide the boot forward until it clicks or sits flush against the plug body.
Forgetting the boot is the classic mistake. If it happens, cut the plug off and start again. It takes about two minutes and costs one connector.
Tools and parts that go with the boot
A decent RJ45 crimping tool matters more than the boot. A weak crimp gives intermittent contact, and no sleeve will fix that. Look for a tool that handles both 8P8C plugs and has a built-in cutter and stripper. Ratcheting models, which release only after a full squeeze, give far more consistent results.
Pick your RJ45 connector to suit the boot. Pass-through connectors let the wires poke out the front and get trimmed flush, which is easier for beginners but slightly bulkier. Standard connectors need precise trimming. Shielded plugs usually leave less space for a boot, so test one before you do a whole batch.
For short runs under 100 m, Cat5e UTP is fine for gigabit speeds. A plain Cat5e UTP cable has a thin jacket and works with nearly every standard boot. If you only need to link a device lacking a native port, an RJ45 network adaptor is a separate item and does not need a boot of its own.
Common problems
The boot will not slide onto the plug: the cable is too thick, or you are pushing from the wrong direction. The boot slides back on its own: it is oversized or the jacket is slippery. Try a smaller size or wrap a turn of electrical tape under it.
Some plugs have a tight shape that makes a boot bulge. If the latch cannot click into the port, remove the boot and check that it is not blocking the tab.
Frequently Asked Questions
Do I need a strain relief boot on every Ethernet cable?
No, but it helps on cables that get moved, plugged often or run outdoors. Fixed cables in a wall box rarely need one. For patch cords, a boot adds real protection for very little money.
Can I add a boot to a cable that already has a plug?
Usually not from the plug end, since the plug is wider than the boot opening. A few boots have a slit that lets them wrap around the cable, though they hold less firmly. The reliable option is to fit it before crimping.
Does a boot change network speed?
No. It is only a plastic sleeve and sits outside the contacts. It may help keep speed stable over time by preventing damage at the plug.
Will a boot fit Cat6 and Cat6a cable?
Cat6 often fits if the jacket is under about 6 mm. Cat6a and shielded cable are thicker and typically need boots made for 7 mm or larger. Measure the jacket with calipers first.